Fighting is difficult. You have to worry about mixups, frames, okizeme- the opponent is a thorn in your side, a problem. He has all of these options and you have to compensate for them. What if- you didn’t have to play his game at all? What if you could control the match and only engage the opponent when you wanted to?
There is a way- a very important concept that you may have heard of before. It’s called “spacing”. It is a technique that, when mastered, can make you impossible to hit- an untouchable master of your domain.
I’d like you to watch a short clip to illustrate what I mean.
(There’s some violence and strong language. Parental discretion is advised.)
Now that’s… good spacing!
Did you see what he did there? He drew a line on the floor with his sword.
Here’s the important part- here is the concept-
Cross the line and you will die.
Did you notice him fighting in a circle? Did you notice the arc of his sword (and his boot)? Anything that approaches the boundary gets destroyed.
Now you can’t physically see this boundary- but I’m sure some of you can imagine it- you can visualize it. It is most certainly there.
For lack of a better word, I personally call this a “killzone”. Just what it says on the tin- enter the killzone, somebody gets hurt.
Let’s see how this applies in the game.
Stage 1: Keepout
If you haven’t been doing so already, you should pay attention to the range of your attacks. How close do you need to be to hit? What’s the distance where if you throw out an attack you’ll whiff? You need to know these things. Most players can answer these questions naturally and intuitively; I need to be… around here, to hit, if I’m not in… this general area I can’t hit the other guy.
You get this from playing over and over again. In essence, you are memorizing your range as you play. Take note of this- your spacing skills will get better with experience. Or, rather, you must have lots of hours logged with the same character so you can intuitively feel exactly where you can attack and where you can’t reach. (This is reason #2 why you need to pick a “main”.)
Now, if you can feel this out, you can probably visualize where you need to be for your attacks to hit. It won’t be exact (at least if you’re not highly experienced) but it’s probably good enough.
---
2/7/2013 UPDATE - Here's a supplementary video, to assist in finding the range of your attacks. If you're having trouble, I recommend you give it a look-see!
---
Let’s look at some pictures.
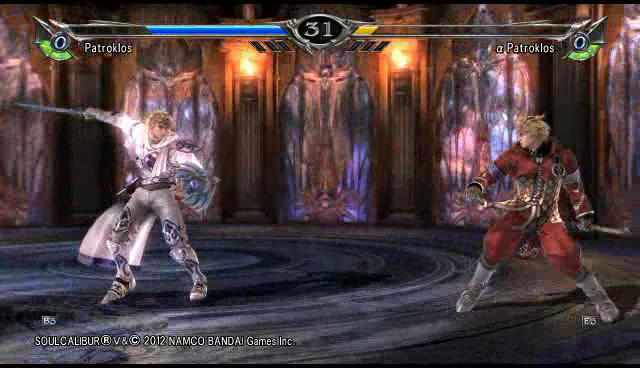
Pat vs. aPat, both are at neutral. What’s my killzone?
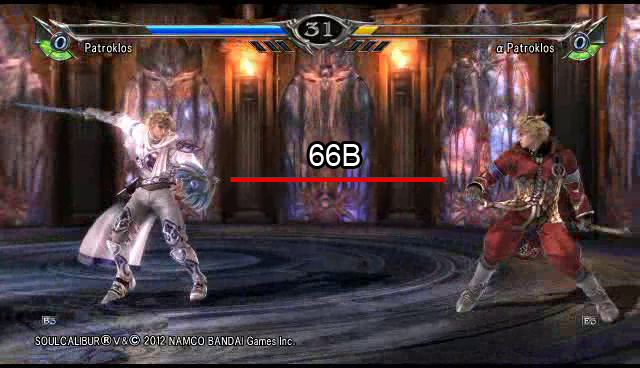
The main spacing tool I use is 66B. The range looks about like this. As you can see, aPat is just outside of my killzone. I have a feeling that he’s going to cross into my killzone very soon, so I input the move.
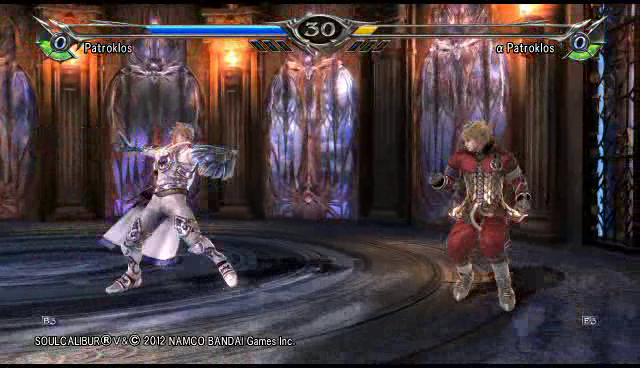
Now, you can’t see the line, but if you can look back at the above picture, and mentally place, visualize that line, that killzone, on this picture, you may have noticed that aPat is a little closer. That is to say, he is now touching the killzone. If everything is as I say, he should be in danger right now, and I should hit him.
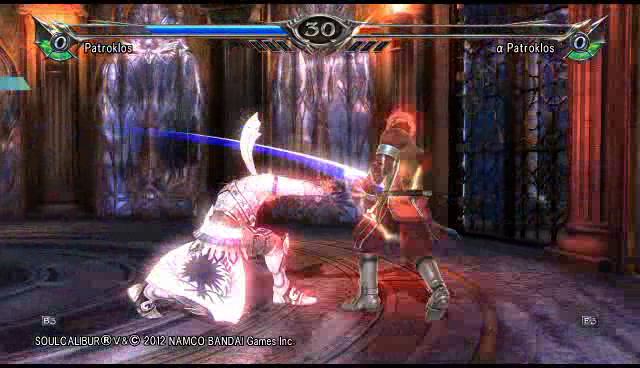
And that’s that. aPat entered the killzone, and he… got killed. It’s a done deal.
Now, here’s the real concept I’m trying to get across, and that is:
Use your attacks to control the space in front of you.
You’re saying, “look, I own this space, this is mine, if you come in here you’re dead.”
If you’ve ever heard the phrase, “Hitting with the tip”, or heard people talking about fighting at “tip range”, what they are referring to is attacking opponents right as they enter the killzone. Hey, I own this space, I’m not letting you go any further.
Now, what you want to do, is hit them when they run in, when they advance. Right when they enter the killzone, metal needs to be flying in their face.
Well, how do you tell when they’re going to run in? Look at their tendencies.
Are they running in recklessly? Are they moving back and forth? Maybe they have a rhythm where a certain time passes and then they get anxious and decide to move in and start attacking.
Whatever method you use to figure out when they are going to approach, when you know they will run in, hit them!
If I have a life lead, I can win by time out and continue to hang back. The opponent will have to approach eventually if they want to land attacks on me so that they can gain a life lead themselves- and this is where I can continue to enforce my killzone. If the opponent continues to run in when they are repelled, they will lose (they end up destroying themselves!)
This is the basics of the “keepout” strategy. That is, I keep you out of my space. It is like a wall, a hurdle that the opponent has to jump before they can start fighting you for real.
To put it another way, it is… also like a shield. It is safety. If your opponent cannot reach you, they cannot hurt you. You are using an attack as defense. This is the true alternative to guarding- using your sword as your G button.
Proper keepout is really, really, really, really frustrating to fight against. By the time your opponent manages to break through your defenses and enter your space, he’ll be weakened and weary- and ripe for the kill.
La Verdadera Destreza
Let’s step aside for a moment so that you can see where I’m taking this concept from.
Drawing lines/circles and fighting with imaginary boundaries or “killzones” is nothing new. Here are pictures from a Spanish system (circa 16th century) of fencing based on geometry and logic.
You don’t have to understand Destreza to understand these pictures. Take a look.


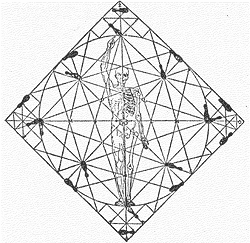
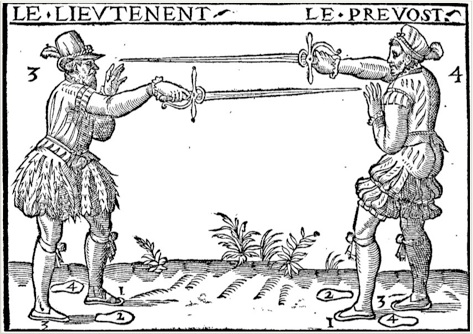
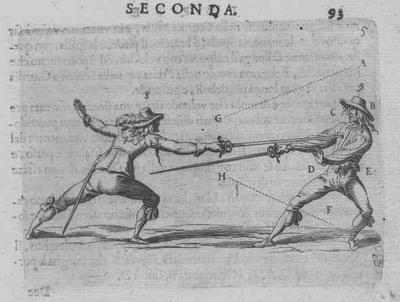
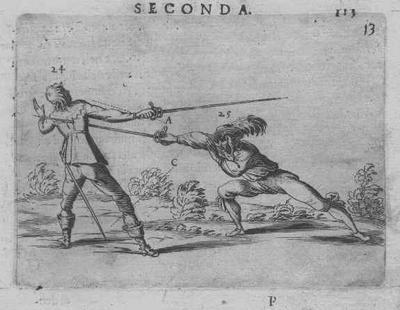
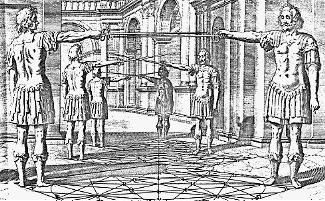
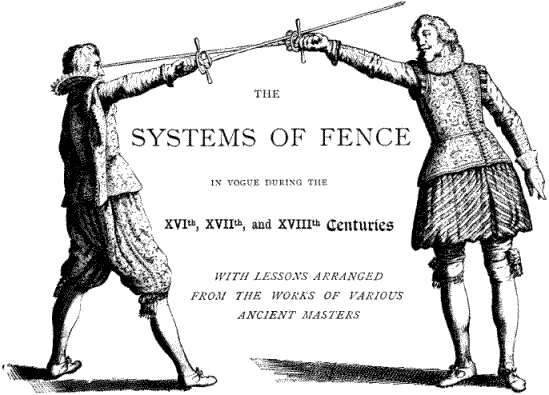
That’s real spacing.
Stage 2: Evasion
Now that we’ve talked about learning your own killzones and enforcing them, we have to talk about the other person’s killzones. Remember this quote?
"It is said that if you know your enemies and know yourself, you will not be imperiled in a hundred battles; if you do not know your enemies but do know yourself, you will win one and lose one; if you do not know your enemies nor yourself, you will be imperiled in every single battle."
We know our killzones. But we can’t get better if we don’t know the other guy’s killzones, too!
Know your opponent’s range!
This comes with experience as well. After you have played against a character many times, you can start to feel where they will be able to hit you, and where they will miss if they try. You can start to visualize their killzones as well.
If you know your opponent’s range, well, what can you do with that information?
What you want to do is stay just outside of that range. Or, you can stay a little bit past the line, and then backdash out when you feel they’re going to attack. Or, you can step forward and back over and over across the line, as a provocation to your opponent, like “dancing” in front of them.
“Dancing”, or erratic, spastic movement, can also be used wholly outside of your opponent’s killzone, because it makes you look like you could possibly run in whenever you wanted. Even if this isn’t the case, moving rapidly like this blurs the edges of your killzone, making it difficult for your opponent to judge the distance properly.
The point of this is to trick your opponent into making a mistake and throwing out an attack too early. When they do, they will whiff, meaning you now have the advantage, and it is your turn to attack.
(This is why you need to know about advantage and disadvantage as a basic function of the game. In real life, it’s called “having the high ground”. Study it! Positions of strength and weakness control everything, from basic frames to spacing to matchups to okizeme. Flipping your situation and turning the tides, shifting your momentum, becomes key- if you are put into disadvantaged situations and you can turn them around and regain the advantage, you will win.)
When you want to move forward, you are at disadvantage (because the opponent can apply keepout before you can get into attack range). However, when the opponent whiffs, they are at disadvantage. When you both are at disadvantage, either-
- one will cancel out the other leading to a reset
or
- one will be bigger than the other leading to advantage or punishment (severe advantage).
If someone is playing the keepout game with you, but they are playing it rather safely- they are using moves that you can’t quite punish on whiff (or maybe your reactions are too slow to punish whiffs properly)- you still have the advantage! Run up and throw them when they whiff (i.e. force a 50/50 using the advantage that you have.) This is extremely effective and an excellent way to start an offense.
Stage 3: Zone Pushing
So far, I’ve been discussing ways to use spacing in a defensive manner- either by keeping opponents out, or by tricking opponents into whiffing.
Well, what about taking the initiative? What about being aggressive? I want to press buttons, I don’t want to wait. What about me?
You can still use spacing aggressively. You can do this by pushing your killzone onto your opponent.
If you know the range of your killzone, instead of keeping the opponent out of your space, you bring the killzone to them. You literally move forward until they are touching the killzone, and then you hit them.
You don’t go any further than the edge of your killzone- you keep the distance constant.
If the opponent tries to move forward, hit them. If they stand still, move forward, touch the killzone to your opponent, then hit them.
If your opponent tries to retaliate, since you are at range, your backdash will most likely be more effective- so just step backwards out of range. They whiff, they are probably now within your killzone (so you should hit them).
This sort of “aggressive spacing” is used most notoriously by Keev. Watch carefully how he is controlling the space as he moves forward or backwards. Watch his range, and watch his movement as it relates to his killzone and to RTD’s killzone.
You might notice that sometimes he approaches past his maximum killzone edge. Why?
You do this so you can conceal your intentions of pushing your killzone and staying at a certain range (if you are too obvious with your actions, you are going to get read and punished). When Keev does move forward, it is when he wants to move forward- he is allowing his controlled space to shrink for any number of reasons (I would believe mostly to provide a changing, varied attack style and become harder to predict).
When he is in close, the principle of the killzone does not change. Instead of using agA, BB, etc. to control space, he can use throws or 3K/1K/6K. These shorter-range tools have their own killzones that should be managed up close as well.
In Closing
If you’ve been playing the game for a while, these concepts should come relatively easy to you. Since you already know your range, it just means you have to pay more attention to enforcing your killzones and/or staying out of your opponent’s.
Everyone has spacing (ranged, relatively safe) tools of some sort. Check your movelist.
The farther out you are, generally the slower the moves are. That doesn’t matter, because you have all that space to work with. The closer you are, generally the faster the moves are. The concept of spacing still works the same, just at a much faster pace. (Check out these matches I had with banes and RTD. Intense spacing with little room for error!)
Remember that killzones apply to all moves. You can control the space in front of you with a simple BB. Don’t forget this!
If you’re not so good at spacing and you’re new, try playing a little longer. Pay attention to your range, where you can hit, where you can’t. Maybe fire up training mode and manually check your maximum ranges there.
Something you can also try is playing as Nightmare. Nightmare is the quintessential spacing character (he’s got a big honkin’ sword!) and at the same time he is suitable for new players as well.
Why?
Well, because Nightmare has great range on many of his attacks (even his 3K and 1K have more range than other similar kick attacks in the game) there is more margin of error for you to work with. If you don’t hit right at the tip, that’s OK, that’s why he’s got a big weapon, so you don’t have to be very precise.
(Of course, when you are precise with Nightmare, it makes you a very dangerous opponent…)
Head into the Global Colosseo, or maybe play some Ranked or a random Player Match room (or play against your friends). Try playing keepout with Nightmare. Use these moves:
agA (map a button to A+G. Input A~A+G, it works the same. No JF, but who cares? We’re just learning spacing.)
6A
3A (just 3A; 3AA is unsafe and easy to punish. 3A is unsafe, but will usually go unpunished because the opponent is hesitating waiting for the second strike. If 3A lands on CH you can follow with 3B. You can go for 3AA if you absolutely know it will hit, but that is generally whiff punish territory.)
B (just single B. You can use BB if you are sure you will get a CH on your opponent running in.)
3B (Don’t use it as a keepout tool- try to save it for when your opponent whiffs. Follow with NSS b:A or just plain NSS B if you can’t do NSS b:A.)
1B (Look at the range! Props to Engared for mentioning this.)
66A (Don’t go into GS and hold forward, just naked 66A.)
22_88A (just single 22A. You can 22AA if you are sure you will get a CH.)
K/6K/3K/1K/66K/A+B/CE (Use these up close. You shouldn’t have to use these if you’re playing keepout properly, but if the other guy gets up in your grill you’ll have to use faster attacks or defensive maneuvers.)
Now, if you look at this list, most of these moves are long-range, with not a lot of risk involved if they’re blocked. These are spacing pokes. The number of spacing pokes is not that much (about 5 or so here). Not too complicated, right?
Spacing is about visualization, timing, and reaction. That’s all- it’s really not hard to execute. You just have to play a different way.
When you’re playing as Nightmare, try not to let your opponent get too close unless you purposely allow him to. Control your space. Pay special attention to your distance and watch the imaginary boundaries in front of you. When they cross that line- hit them!
If you do not understand spacing well two consequences occur as a result:
… Mind the gap, son!
There is a way- a very important concept that you may have heard of before. It’s called “spacing”. It is a technique that, when mastered, can make you impossible to hit- an untouchable master of your domain.
I’d like you to watch a short clip to illustrate what I mean.
(There’s some violence and strong language. Parental discretion is advised.)
Now that’s… good spacing!
Did you see what he did there? He drew a line on the floor with his sword.
Here’s the important part- here is the concept-
Cross the line and you will die.
Did you notice him fighting in a circle? Did you notice the arc of his sword (and his boot)? Anything that approaches the boundary gets destroyed.
Now you can’t physically see this boundary- but I’m sure some of you can imagine it- you can visualize it. It is most certainly there.
For lack of a better word, I personally call this a “killzone”. Just what it says on the tin- enter the killzone, somebody gets hurt.
Let’s see how this applies in the game.
Stage 1: Keepout
If you haven’t been doing so already, you should pay attention to the range of your attacks. How close do you need to be to hit? What’s the distance where if you throw out an attack you’ll whiff? You need to know these things. Most players can answer these questions naturally and intuitively; I need to be… around here, to hit, if I’m not in… this general area I can’t hit the other guy.
You get this from playing over and over again. In essence, you are memorizing your range as you play. Take note of this- your spacing skills will get better with experience. Or, rather, you must have lots of hours logged with the same character so you can intuitively feel exactly where you can attack and where you can’t reach. (This is reason #2 why you need to pick a “main”.)
Now, if you can feel this out, you can probably visualize where you need to be for your attacks to hit. It won’t be exact (at least if you’re not highly experienced) but it’s probably good enough.
---
2/7/2013 UPDATE - Here's a supplementary video, to assist in finding the range of your attacks. If you're having trouble, I recommend you give it a look-see!
---
Let’s look at some pictures.
Pat vs. aPat, both are at neutral. What’s my killzone?
The main spacing tool I use is 66B. The range looks about like this. As you can see, aPat is just outside of my killzone. I have a feeling that he’s going to cross into my killzone very soon, so I input the move.
Now, you can’t see the line, but if you can look back at the above picture, and mentally place, visualize that line, that killzone, on this picture, you may have noticed that aPat is a little closer. That is to say, he is now touching the killzone. If everything is as I say, he should be in danger right now, and I should hit him.
And that’s that. aPat entered the killzone, and he… got killed. It’s a done deal.
Now, here’s the real concept I’m trying to get across, and that is:
Use your attacks to control the space in front of you.
You’re saying, “look, I own this space, this is mine, if you come in here you’re dead.”
If you’ve ever heard the phrase, “Hitting with the tip”, or heard people talking about fighting at “tip range”, what they are referring to is attacking opponents right as they enter the killzone. Hey, I own this space, I’m not letting you go any further.
Now, what you want to do, is hit them when they run in, when they advance. Right when they enter the killzone, metal needs to be flying in their face.
Well, how do you tell when they’re going to run in? Look at their tendencies.
Are they running in recklessly? Are they moving back and forth? Maybe they have a rhythm where a certain time passes and then they get anxious and decide to move in and start attacking.
Whatever method you use to figure out when they are going to approach, when you know they will run in, hit them!
If I have a life lead, I can win by time out and continue to hang back. The opponent will have to approach eventually if they want to land attacks on me so that they can gain a life lead themselves- and this is where I can continue to enforce my killzone. If the opponent continues to run in when they are repelled, they will lose (they end up destroying themselves!)
This is the basics of the “keepout” strategy. That is, I keep you out of my space. It is like a wall, a hurdle that the opponent has to jump before they can start fighting you for real.
To put it another way, it is… also like a shield. It is safety. If your opponent cannot reach you, they cannot hurt you. You are using an attack as defense. This is the true alternative to guarding- using your sword as your G button.
Proper keepout is really, really, really, really frustrating to fight against. By the time your opponent manages to break through your defenses and enter your space, he’ll be weakened and weary- and ripe for the kill.
La Verdadera Destreza
Let’s step aside for a moment so that you can see where I’m taking this concept from.
Drawing lines/circles and fighting with imaginary boundaries or “killzones” is nothing new. Here are pictures from a Spanish system (circa 16th century) of fencing based on geometry and logic.
You don’t have to understand Destreza to understand these pictures. Take a look.
That’s real spacing.
Stage 2: Evasion
Now that we’ve talked about learning your own killzones and enforcing them, we have to talk about the other person’s killzones. Remember this quote?
"It is said that if you know your enemies and know yourself, you will not be imperiled in a hundred battles; if you do not know your enemies but do know yourself, you will win one and lose one; if you do not know your enemies nor yourself, you will be imperiled in every single battle."
We know our killzones. But we can’t get better if we don’t know the other guy’s killzones, too!
Know your opponent’s range!
This comes with experience as well. After you have played against a character many times, you can start to feel where they will be able to hit you, and where they will miss if they try. You can start to visualize their killzones as well.
If you know your opponent’s range, well, what can you do with that information?
What you want to do is stay just outside of that range. Or, you can stay a little bit past the line, and then backdash out when you feel they’re going to attack. Or, you can step forward and back over and over across the line, as a provocation to your opponent, like “dancing” in front of them.
“Dancing”, or erratic, spastic movement, can also be used wholly outside of your opponent’s killzone, because it makes you look like you could possibly run in whenever you wanted. Even if this isn’t the case, moving rapidly like this blurs the edges of your killzone, making it difficult for your opponent to judge the distance properly.
The point of this is to trick your opponent into making a mistake and throwing out an attack too early. When they do, they will whiff, meaning you now have the advantage, and it is your turn to attack.
(This is why you need to know about advantage and disadvantage as a basic function of the game. In real life, it’s called “having the high ground”. Study it! Positions of strength and weakness control everything, from basic frames to spacing to matchups to okizeme. Flipping your situation and turning the tides, shifting your momentum, becomes key- if you are put into disadvantaged situations and you can turn them around and regain the advantage, you will win.)
When you want to move forward, you are at disadvantage (because the opponent can apply keepout before you can get into attack range). However, when the opponent whiffs, they are at disadvantage. When you both are at disadvantage, either-
- one will cancel out the other leading to a reset
or
- one will be bigger than the other leading to advantage or punishment (severe advantage).
If someone is playing the keepout game with you, but they are playing it rather safely- they are using moves that you can’t quite punish on whiff (or maybe your reactions are too slow to punish whiffs properly)- you still have the advantage! Run up and throw them when they whiff (i.e. force a 50/50 using the advantage that you have.) This is extremely effective and an excellent way to start an offense.
Stage 3: Zone Pushing
So far, I’ve been discussing ways to use spacing in a defensive manner- either by keeping opponents out, or by tricking opponents into whiffing.
Well, what about taking the initiative? What about being aggressive? I want to press buttons, I don’t want to wait. What about me?
You can still use spacing aggressively. You can do this by pushing your killzone onto your opponent.
If you know the range of your killzone, instead of keeping the opponent out of your space, you bring the killzone to them. You literally move forward until they are touching the killzone, and then you hit them.
You don’t go any further than the edge of your killzone- you keep the distance constant.
If the opponent tries to move forward, hit them. If they stand still, move forward, touch the killzone to your opponent, then hit them.
If your opponent tries to retaliate, since you are at range, your backdash will most likely be more effective- so just step backwards out of range. They whiff, they are probably now within your killzone (so you should hit them).
This sort of “aggressive spacing” is used most notoriously by Keev. Watch carefully how he is controlling the space as he moves forward or backwards. Watch his range, and watch his movement as it relates to his killzone and to RTD’s killzone.
You might notice that sometimes he approaches past his maximum killzone edge. Why?
You do this so you can conceal your intentions of pushing your killzone and staying at a certain range (if you are too obvious with your actions, you are going to get read and punished). When Keev does move forward, it is when he wants to move forward- he is allowing his controlled space to shrink for any number of reasons (I would believe mostly to provide a changing, varied attack style and become harder to predict).
When he is in close, the principle of the killzone does not change. Instead of using agA, BB, etc. to control space, he can use throws or 3K/1K/6K. These shorter-range tools have their own killzones that should be managed up close as well.
In Closing
If you’ve been playing the game for a while, these concepts should come relatively easy to you. Since you already know your range, it just means you have to pay more attention to enforcing your killzones and/or staying out of your opponent’s.
Everyone has spacing (ranged, relatively safe) tools of some sort. Check your movelist.
The farther out you are, generally the slower the moves are. That doesn’t matter, because you have all that space to work with. The closer you are, generally the faster the moves are. The concept of spacing still works the same, just at a much faster pace. (Check out these matches I had with banes and RTD. Intense spacing with little room for error!)
Remember that killzones apply to all moves. You can control the space in front of you with a simple BB. Don’t forget this!
If you’re not so good at spacing and you’re new, try playing a little longer. Pay attention to your range, where you can hit, where you can’t. Maybe fire up training mode and manually check your maximum ranges there.
Something you can also try is playing as Nightmare. Nightmare is the quintessential spacing character (he’s got a big honkin’ sword!) and at the same time he is suitable for new players as well.
Why?
Well, because Nightmare has great range on many of his attacks (even his 3K and 1K have more range than other similar kick attacks in the game) there is more margin of error for you to work with. If you don’t hit right at the tip, that’s OK, that’s why he’s got a big weapon, so you don’t have to be very precise.
(Of course, when you are precise with Nightmare, it makes you a very dangerous opponent…)
Head into the Global Colosseo, or maybe play some Ranked or a random Player Match room (or play against your friends). Try playing keepout with Nightmare. Use these moves:
agA (map a button to A+G. Input A~A+G, it works the same. No JF, but who cares? We’re just learning spacing.)
6A
3A (just 3A; 3AA is unsafe and easy to punish. 3A is unsafe, but will usually go unpunished because the opponent is hesitating waiting for the second strike. If 3A lands on CH you can follow with 3B. You can go for 3AA if you absolutely know it will hit, but that is generally whiff punish territory.)
B (just single B. You can use BB if you are sure you will get a CH on your opponent running in.)
3B (Don’t use it as a keepout tool- try to save it for when your opponent whiffs. Follow with NSS b:A or just plain NSS B if you can’t do NSS b:A.)
1B (Look at the range! Props to Engared for mentioning this.)
66A (Don’t go into GS and hold forward, just naked 66A.)
22_88A (just single 22A. You can 22AA if you are sure you will get a CH.)
K/6K/3K/1K/66K/A+B/CE (Use these up close. You shouldn’t have to use these if you’re playing keepout properly, but if the other guy gets up in your grill you’ll have to use faster attacks or defensive maneuvers.)
Now, if you look at this list, most of these moves are long-range, with not a lot of risk involved if they’re blocked. These are spacing pokes. The number of spacing pokes is not that much (about 5 or so here). Not too complicated, right?
Spacing is about visualization, timing, and reaction. That’s all- it’s really not hard to execute. You just have to play a different way.
When you’re playing as Nightmare, try not to let your opponent get too close unless you purposely allow him to. Control your space. Pay special attention to your distance and watch the imaginary boundaries in front of you. When they cross that line- hit them!
It is pretty fun stuff, try it, you might like it.If you do not understand spacing well two consequences occur as a result:
- You will be unable to approach your opponents.
- You will whiff. We all know what that means.
… Mind the gap, son!

