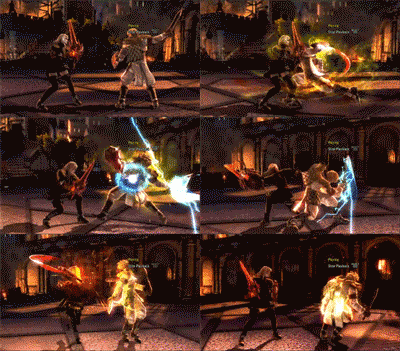
4A/4[A] Study + Step Punishment List (Work in Progress)

SCPartisan

Holy Moly

6Okrt.png
~Work in Progress~​
As most Pyrrha Ω players already know, 4[A]A is easily the most damaging combo starter she has available. Typically being used post guard break, it can net up to...​

- 126 damage meterless (4[A]A DNS B:4 + clean hit)
- 128 damage with CE (4[A]A 6BB CE *character/spacing dependant*)
- 102 damage meterless on generic ring out/wallsplat combo (4[A]A 3B DNS B/or wallsplat)

As you can see, the damage here is VERY good. Only problem with this move is that it is an i38 high that will either be blocked 100% of the time (honestly not a bad thing) or ducked on reaction (this is bad)...But it still has many uses!

Besides the obvious use of post guard break, you can set up this move a number of ways...

In this "guide" I will be going over the options above and looking at this move's usefulness against each character and their movelist. Additionally, I'll be taking an in depth look at 4A/4[A]'s evasiveness and their other properties.

~​
 
  • Thread starter
  • Admin
  • #2
Step Punishment List:
GvF9y.gif

Legend:
Optimal Combo: The most damaging combo you can do without using meter. Wall combos are not factored so attempt wallsplats at your own discretion.

Difficulty: How easy the 4[A]A side step punish is to execute consistently. Will be measured in three levels...

Easy - Not much timing required. Easy to execute.
Moderate - Some timing required. Requires basic to moderate execution.
Hard - Can be very risky to attempt. Due to blockstun/JG/Strings, execution is difficult.

C: Clockwise/Up on 1P, Down on 2P
CC: Counter Clockwise/Down on 1P, Up on 2P

Patroklos:
6BB:
- Sidestep 2nd hit and 4[A]A.
Optimal Combo:
- 4[A]A DNS B:4 = 118 dmg
Difficulty: Moderate

6BBB:
- Sidestep 2nd hit (CC step is easier) and 4[A]A.
Optimal Combo:
- 4[A]A DNS B:4 = 118 dmg
Difficulty: Moderate

A+B:
- Duck under/step and 4[A]A.
Optimal Combo:
- 4[A]A DNS B:4 = 118 dmg
Difficulty: Hard

* This move recovers rather fast on whiff (at least for the sake of 4[A]) so be careful of the timing.​

[A+B]:
- Duck under/step and 4[A]A.
Optimal Combo:
- 4[A]A DNS B:4 = 118 dmg
Difficulty: Easy

1B BE:
- Duck 2nd hit, step 3rd and 4[A]A.
Optimal Combo:
- 4[A]A DNS B:4 = 118 dmg (C Step only)
- 4[A]A 3B DNS B = 105 dmg (CC Step only)
Difficulty: Hard


66A BE:
- Step 2nd hit and 4[A]A.
Optimal Combo:
- 4[A]A DNS B:4 = 118 dmg
Difficulty: Easy

JS AB:
- Step 2nd hit and 4[A]A.
Optimal Combo:
- 4[A]A DNS B:4 = 118 dmg
Difficulty: Easy

ZWEI:
22_88B:
- Side step 2nd hit (C step only) and 4[A]A.
Optimal Combo:
- 4[A]A DNS B:4 = 118 dmg
Difficulty: Moderate

*Moderate only because you can only step Clockwise/to his right.

3A BE:
- Side step 2nd hit (CC step only) and 4[A]A
Optimal Combo:
- 4[A]A DNS B:4 = 118 dmg
Difficulty: Hard

*You can only step Counter Clockwise/to his left.

Leixia:
[A+B]:
- Side step 2nd hit and 4[A]A
Optimal Combo:
- 4[A]A DNS B:4 = 118 dmg (C step only)
- 4[A]A 3B DNS B = 105 dmg (CC step only)
Difficulty: Hard

3B+K K:
- Side step 2nd hit and 4[A]A
Optimal Combo:
- 4[A]A DNS B:4 = 116 dmg (C step) 121 dmg (CC step) *angle depending
Difficulty: Easy

66BbB:
- Side step 2nd hit (C step is much more consistent) and 4[A]A
Optimal Combo:
- 4[A]A DNS B:4 = 116 dmg
Difficulty: Moderate

66BB4:
- Side step 2nd hit and 4[A]A
Optimal Combo:
- 4[A]A 3B DNS B = 102 dmg
Difficulty: Easy

66BbB4:
- Side step 2nd hit (C step is much more consistent) and 4[A]A
Optimal Combo:
- 4[A]A DNS B:4 = 116 dmg
Difficulty: Moderate

22_88kAAK:
- Side step last hit (4th) and 4[A]A
Optimal Combo:
- 4[A]A DNS B:4 = 121 dmg (CC step) 116 dmg (C step)
Difficulty: Easy

*22_88kAAB will recover fast enough to allow Leixia to block/duck the 4[A]A

Natsu:
6AB:
- Step 2nd hit and 4[A]A
Optimal Combo:
- 4[A]A DNS B:4 = 116 dmg (C step only)
Difficulty: Moderate

*6AB is only C step-able. If you step the other side, the 2nd hit of the B will hit you
* 6AK will catch step, so be careful when choosing to go with this option.

66AB (delay only):
- Step 2nd hit and 4[A]A
Optimal Combo:
- 4[A]A DNS B:4 = 117 dmg (C step only)
- 4[A]A 3B DNS B = 105 dmg (CC step only)
Difficulty: Moderate

* Since this is pretty much a CH confirmable string, it won't be too often you see a good Natsu player just throw this out on block. 4[A]A should work with all timings except for an instant 66AB.
*If she does 66AB4 PO, 4[A] will usually TC the PO A, but lose to PO K, PO B, PO B+K, PO A+B and PO BE.

HOV A+B:
- Sidestep on reaction and 4[A]A
Optimal Combo:
- 4[A]A DNS B:4 = 117 dmg (C step only)
- 4[A]A 3B DNS B = 105 dmg (CC step only)
Difficulty: Easy

*Same thing applies to WRO (Wind Roll) WR BBB.

Ezio Auditore:
6ABB:
- Duck 2nd hit and step into 4[A]A
Optimal Combo:
- 4[A]A DNS B:4 = 117/121 dmg C/CC step respectively
Difficulty: Easy

*6ABB is a CH confirmable string so be careful of attempting the 4[A]A after the 2nd hit.

4AB:
- Step after blocking 1st hit and 4[A]A
Optimal Combo:
- 4[A]A DNS B:4 = 118 (C step only)
- 4[A]A 3B DNS B = 102 dmg (CC step only)
Difficulty: Easy

*Watch out for 4AB8/2 as it will cause the 4[A] to whiff.

WRBB:
- Step after 1st hit is blocked and 4[A]A (CC step only)
Optimal Combo:
- 4[A]A 3B DNS B = 103 dmg (CC step only)
Difficulty: Moderate

66AB:
- Step after 1st hit is blocked and 4[A]A
Optimal Combo:
- 4[A]A DNS B:4 = 119 (C step only)
- 4[A]A 3B DNS B = 102 dmg (CC step only)
Difficulty: Easy

*Unlike 4AB, even if Ezio rolls after 66AB you can still 4[A]A him before it starts. 66A2B will beat it out, however.

66BB:
- Step after 1st hit is blocked and 4[A]A
Optimal Combo:
- 4[A]A DNS B:4 = 119 (C step only)
- 4[A]A 3B DNS B = 100-104 dmg (CC step only)
Difficulty: Easy

*66BB BE recovers slightly faster but 4[A]A will still work.

Raphael:
6BB BE/Prep BB BE
- Step after 5th hit (multiple stabs) and 4[A]A
Optimal combo:
- 4[A]A DNS B:4 = 117 (must JG the 3rd hit into stabs to step clockwise(C))
Difficulty: Easy

Prep BBB
- Step after 2nd hit and 4[A]A
Optimal combo:
- 4[A]A DNS B:4 = 117 (C step only)
- 4[A]A 3B DNS B = 105 (CC step)
Difficulty: Moderate

Viola:

Pyrrha:
4AB
- Step 2nd hit and 4[A]A
Optimal combo:
- 4[A]A DNS B:4 = 117 dmg (C step only)
- 4[A]A 3B DNS B = 105 dmg (CC step)
Difficulty: Moderate
*Pyrrha 4[A]B cannot be stepped.
* Watch 4[A] and 4AA will beat out step.

2BB
- Step 2nd hit and 4[A]A
Optimal combo:
- 4[A]A DNS B:4 = 119 dmg (C step only)
- 4[A]A 3B DNS B = 100 dmg (CC step)
Difficulty: Easy
*Much better to block punish since any good Pyrrha player won't be throwing this out very often on block.

3KK
- Step 2nd hit and 4[A]A
Optimal combo:
- 4[A]A DNS B:4 = 118 dmg (C step only)
- 4[A]A 3B DNS B = 103 dmg (CC step)
Difficulty: Easy
*Much like 2BB, it is better to block punish since any good Pyrrha player won't be throwing this out very often on block.

B+K B
- Step 2nd hit and 4[A]A
Optimal combo:
- 4[A]A DNS B:4 = 119 dmg (C step only)
- 4[A]A 3B DNS B = 104 dmg (CC step)
Difficulty: Easy
*Much like 2BB, it is better to block punish since any good Pyrrha player won't be throwing this out very often on block. Stepping after B+K is a safeish option though.

44KB
- Step 2nd hit and 4[A]A
Optimal combo:
- 4[A]A DNS B:4 = 117 dmg (C step only)
- 4[A]A 3B DNS B = 105 dmg (CC step)
Difficulty: Easy
*Since she has a horizontal option after the 44K, it is best to just react to either option and punish accordingly

66/33/99B+KAB/Angel Side Step B+KAB
- Step 3rd hit and 4[A]A
Optimal combo:
- 4[A]A DNS B:4 = 116 dmg (C step only)
- 4[A]A 3B DNS B = 104 dmg (CC step)
Difficulty: Easy
*Better to duck 2nd hit and punish.

Siegfried:
Hilde:
Xiba:
Ivy:
Cervantes:
Aeon:
WR AB
- Step 2nd hit and 4[A]A.
Optimal Combo:
- 4[A]A DNS B:4 = 117 dmg (C step only)
- 4[A]A 3B DNS B = 105 dmg (CC step only)
Difficulty: Moderate

BB:
- Step 2nd hit and 4[A]A.
Optimal Combo:
- 4[A]A DNS B:4 = 117 dmg (C step only)
- 4[A]A 3B DNS B = 105 dmg (CC step only)
Difficulty: Easy

BBB:
- Step 2nd hit and 4[A]A. 3rd hit gets interrupted.
Optimal Combo:
- 4[A]A 3B DNS B = 108-110 dmg
Difficulty: Easy

22_88AB (delayed):
- Step 2nd hit and 4[A]A. (C step only).
Optimal Combo:
- 4[A]A DNS B:4 = 117 dmg
Difficulty: Hard

*Since this move requires a delay to get the step in, it is rather impractical given the risk of CH.

6B BE:
- Step 6th hit (after the 5 quick jabs) and 4[A]A
Optimal Combo:
- 4[A]A DNS B:4 = 117 dmg (C step only)
- 4[A]A 3B DNS B = 105 dmg (CC step only)
Difficulty: Easy


Tira:
Nightmare:
Mitsurugi:
Maxi:
Yoshimitsu:
Dampierre:
Voldo:
Astaroth:
α Patroklos:
Algol:
Pyrrha Ω:
 
  • Thread starter
  • Admin
  • #5
Thread opened!

If you have any questions, concerns or comments on the format, please let me know!


07/12/2012
- Patroklos added to sidestep punish list.
- Aeon added to sidestep punish list.
- ZWEI added to sidestep punish list.
 
4[A]A can be used only after certain moves in a guard break, the only one I remember is 6K, do you actually have a full list or something?
 
  • Thread starter
  • Admin
  • #8
6K, 1B, B+K, 4[A]/AA, 4[A], WR K, and 4B among others.

I'll include a full list once I test it.
 
Glad to see this being updated, it's a great project.

I suppose you're not including JG punishes but I'll throw this out there anyway... For Pyrrha, you can JG the second hit of her CE and then step the third allowing you to punish with 4[A]A.
 
Glad to see this being updated, it's a great project.

I suppose you're not including JG punishes but I'll throw this out there anyway... For Pyrrha, you can JG the second hit of her CE and then step the third allowing you to punish with 4[A]A.

Thanks! I'll be trying to finish up the side step list before the end of next week.

As for JG punishes, since there will probably won't be too many I'll include them in a bonus section or something.
 
Hi Partisan.

One contribution of mine :

Yoshimitsu :
3A B BE, C step the third hit and 4[A]A DNS B:4
Difficulty : SO VERY EASY ( you have the time to confim the BE use )

Aeon :
It is more a mindgame won than a punishment but hey. I should tell this somewhere.
If you can make the Aeon player use 9K after a pattern of move, 4[A]A will duck the 9K !

Algol :
6KK
4[A]A will duck the 2nd hit.
You can just duck and buffer DNS B or DNS A CE or even Just Guard the 2nd hit.

The aGI shoryuken move :
I do know that if you JG that, 4[A]A DNS B:4 will be free ! But can we step it ? I'll test.
 
For Pyrrha, as you can successfully JG her Tech Trap 22A 6B BE, JG the shield attack, step and punish with 4[A]A DNS B:4 for 117 damages.
Step her on CC once you JG.
Difficulty : Moderate/Hard because we must JG the Tech trap.

But it's worth working, as JG can maximise Pyrrha Omega's potential.
 
It's been a long time. Every little step is still a step of a progress.

Hilde :

JG her C3BB, the second hit when she jumps.
It's easy to confirm the JG, so would the Pyrrha Omega's players be so kind as to train to JG this and to buff 4[A]A DNS:B.

Here the exemple below at 13:15


We'll be delighted. :)
 
Back