Dampierre and Co's CaS Tips and Tricks Compendium Curio~!

Thanks for the tips, these are all quite useful. I guess I'll join the party and leave some of my own.

By using the Number 0 sticker on your character's head and placing/sizing it around their mouth, you can give your character goatee-style facial hair. You can also change up the pseudo facial hair by adding other stickers that match your character's skin color around it to get different results, like a solo mustache or chin hair.
An example of such below. Sorry for the crap image quality.
vince_1_by_klobb17-d54mzwr.jpg

Much obliged fair sir.
 
I'm not sure if any of these have been posted yet but here goes.

Feature Augmentation and Male Fanservice:

I'll be covering the use of some stickers - Motif 65 (Lips), Scar 7 (Crescent scar), and Motif 1 (Circle) along with the Heart object. These items are used to augment features in most of my CaS but go unnoticed since I tend to not put a main focus on them. There is somewhat heavy use of images so I've placed it within spoilers.

First spoiler contains a basic primer on Scar 7.
GemmaLipsDisp.png

Here we have Gemma.
On the left image, she is using Scar 7 below her right eye but not left (from her perspective, not ours). On the right image, Scar 7 is added below her lip. Beneath the eye, it creates a more defined, strong look. Below the lip, it creates and illusion of both scale and depth. Changing the size of the scar can narrow the lower lip to a point as well.
When using the scar, rotate it 15 "presses" to the left - this will get it to a near perfect angle for lip and eye use.
Rotating it under the eye 1 or 2 clicks either way (after the initial 15 to the left) can give interesting results as well.

Girllips.png

Spoiler contains more info and tips.
Vlatna, Paer'dha, Umali, Nahique and Gilea are all using Scar 7 below their lips.
Notice how it works with different skin tones. The scar cannot be recolored, so it won't work on -everyone- you make.
You'll notice Vlatna has a beauty mark. This can be achieved by using Motif 43 (Yin Yang) along with 2 skin-colored circles.
Nahique employs the use of Motif 66. Coupled with the dark red of her eyes, this gives the illusion of size and brings a dramatic look to the character.
Nahique and Paer'dha both use the Lips motif to further enlarge their lips. On Nahique, it's focused on enlarging her lower lip. On Paer'dha, it's her upper lip. This is done by slightly offsetting the 'lipstick' above and/or below the lipline. This is actually a common make-up trick IRL.
On Umali, scar 7 is used to give her a constant cocky smirk.
Another unshown trick with the Lips sticker is using 2 (or more) along with make-up to create intricate lipstick effect like lip-liner (a darker rim around the lip edges).

Spoiler contains more info and tips concerning Scar 7, Motif 1 and the Lips motif.
MaleLipNip.png

Sydney, Toiruhn, Muephance and Tamil are all using Scar 7 below their lips as well. They are also all using the Lips sticker to further enlarge their lips. The methods work just as well for -most- male faces as they do for female.
Using 2 of the circle motifs, scaled far down (+1 to +3 away from the farthest left) recolored about 5 shades darker than the skin gives a decent areola enlarging effect. The original areola still shows through, no matter what color you pick, though.
The areola will stretch naturally, like a real set, when the arms move - this is shown in the middle on Nidour with one arm raised. One stays oblong while the other stretches into a circle.

Spoiler contains more info and tips concerning Scar 7's eye uses.
Accent.png

Shiaia, Juliana and (no name yet) are all employing the use of Scar 7 to make their eyes more dramatic. It's a very subtle effect. In Shiaia, the right eye differs greatly from the left since the left does not use the scar - notice it?
Shiaia is also using the Lips sticker and Scar 7 below the lips for a large-lips look.

The next spoiler contains stuff most of the community is uppity towards. :p
TheBoys.png

Maleteu, Trobeahn, Moinadh an Jacob are all proudly displaying their bulges. If the women get to have their tits propped on the shelf - the men get to put of their trophies too!
This is the Heart object. The most believable (semi-modest) bulge is on Jacob while the most outrageous is on Moinadh.
All males should use the heart in this fashion as a starting point:
Vertical -5
Back -30
Width +5
Length -5
Depth -10
Rotate V. -90
Angle +90
Horizontal 60
That formula creates Jacob's bulge. Adding more width will make the heart protrude more. A bulge that sticks far forward implies a high and tight scrotum while less implies a more loose, hanging one. Adding more length will imply a longer-hanging sausage and scrotum. Adding more depth will imply a more thick, hefty package. Rotating the horizontal between 50 and 75 gives the best result.
Jacob is also displayed using scar7 below his lips. He and Maleteu are both showing the use of Motif 1 as well, on their chest.
Typically, one would photoshop away the seams but they are left untouched for this demonstration. One can achieve a somewhat seamless look like Trobeahn, though, by matching patterns.

hidden.png

Yuji, Nidour, Jeremius, Joseph and Djizhui are a bit more modest in their display.
Bulges don't always need to be on display, though. Sometimes they can be a simple part of the outfit, as in Joseph's design.
For all the others displayed, it acts as more of an up-shorts sneak peak revealed during gameplay. :p Ecchi!

General tips:
White sclera (rather than the default grey) makes eyes appear larger from a distance.

I hope this was helpful and enjoyable! :3
 
We're not limited to one save file per flash drive. I dunno if this is something practically everyone's already figured out, but I think it's a good process to outline, just in case. I'll outline the process starting from getting your save onto a flash drive from a PS3. At the end of this process, you should know how to maintain multiple saves on the same flash drive. It's not quick and easy access by any means, but with this, the amount of CaS slots available to you is only limited by how many saves you can fit onto your drive.

DISCLAIMER: I'm not responsible for you accidentally overwriting any of your saves. However, if there is an error in the information I provide here, please let me know so I can correct it and help prevent other people from accidental overwrites.

Archiving Saves:
1) On the XMB with a USB flash drive plugged in, go to Game > Saved Data Utility (PS3) > SOULCALIBUR V. Hit Triangle, then copy. Select your flash drive as the destination.

wrXHb.png

2) Your save is in [drive letter]:/PS3/SAVEDATA/BLUS30736. Copy this folder.

CUPeV.png

3) You want a way to keep track of which save file is which. The way I do this is by creating a folder called something like "CaS 1-50." This folder can be anywhere outside of [drive letter]:/PS3/SAVEDATA/BLUS30736, but I keep it out of [drive letter]:/PS3 altogether, just to be safe.

4on1y.png

4) Paste your copied BLUS30736 folder inside your "CaS1-50" folder. At this point, you are ready for a fresh set of 50 more data slots. You may delete any or all of your CaS in game to make room for new ones on this new save.

5) To copy your second save, repeat steps 1-4, except this time, copy this second save into a folder called something like "CaS 51-100."

6) As an extra precaution, I keep another backup of "CaS 1-50" and "CaS 51-100" somewhere else, in case I accidentally overwrite either one.

Switching Saves:
1) Go into the folder for whichever save you want, then copy the BLUS30736 folder in there.

4on1y.png

For example, let's say the save currently on the PS3 has CaS 51-100 on it, but I want to switch back to CaS 1-50. I'd copy the BLUS30736 folder in my "CaS 1-50" folder. go to [drive letter]:/PS3/SAVEDATA/, then paste BLUS30736 into there.

2) Paste the BLUS30736 folder into [drive letter]:/PS3/SAVEDATA. It will overwrite whichever BLUS30736 folder folder is currently in there at the moment, but if you've already kept a backup of that save, it should be alright.

wrXHb.png

This is the directory into which the PS3 will copy saves. Thus, it is also the directory from which the PS3 accesses and copies saves. This is why we paste whichever BLUS30736 folder we currently want into this directory.

3) On the PS3 XMB, go to Game > Saved Data Utility (PS3) > [your flash drive] > SOULCALIBUR V. Hit triangle, then Copy to overwrite the save on the PS3 with the save on the flash drive.

In the example above, this process would overwrite Cas 51-100 with CaS 1-50. Assuming you have an up-to-date backup of Cas 51-100, on your flash drive or elsewhere, this is no problem.
 

Aha, yay! I've been looking for this information for a while now. Between my finished creations, my many, many experimental and uncompleted ones, and my mum's dabbles with the engine, I've been hoping to figure out a way to earn more slots without resorting to another 50-hour run through Arcade Mode. I'll have to give it a try sometime soon and see how it works... much obliged, Pascuzzi!
 
What I'm looking for is something specific. I'm trying to make a P.Omega CAS in a style similar to TRON. I've seen this done successfully from other people when I play them online, and I've been trying to replicate it in CAS, but very little success so far. Anybody got any tidbits on that?
 
What I'm looking for is something specific. I'm trying to make a P.Omega CAS in a style similar to TRON. I've seen this done successfully from other people when I play them online, and I've been trying to replicate it in CAS, but very little success so far. Anybody got any tidbits on that?

Start with the Rubber Unitard and choose a pattern that has lines in it. I find the Basic and Oriental pattern sets work the best for this, personally. Now set it all to black(0:43,31) and increase it to maximum size. That won't do at all, so let's experiment with having individual parts of it bright green! Just do one part of the pattern at a time, when it starts looking close to what you're wanting try rotating it. That should look pretty close, but not quite. Finish it off with some single-color stickers to do away with some of the unnecessary lines. That should work fine.
 
Smoking Materials

1. The horn can be a cigar; diminish its width/depth and maximize length to make it less conical; bury the skinny end as far as possible in the head. It can be placed in the corner of the mouth; works better with some faces than others. When choosing texture, remember that a real cigar is brown-green and uses a leaf for a natural wrapper; I like Oriental 10 with the colors changed. You won't really pick out the detail, just notice it has an organic texture instead of smooth,

2. The horns "Helmet Ornament: Pirate" can be used to make a pipe (rotate until the horns overlap). Real pipes are usually made of briar, a wood with no grain, which should help choosing a texture; I like Basic 15. They also usually have a stem but some might be carved as a single piece, which is the best I've been able to manage.

3. The ant antenna can be used to make a cigarette, again rotate until they overlap. They'll diverge at the joint, but that part gets buried in the model's head (be careful to check the neck for "Frankenstein" leads). Size is OK as is; for a custom character, vertical rotation to about -120 is a good position, but the attitude of the cig can change the attitude of the character from contemptuous (steeply down) to smug (angled up). For a regular character, you may need an angle up or down to keep the cig between the character's lips during post-battle gloating. Angle down is preferable so the balance of the antenna won't be visible when the character's mouth is open. Depending on the angle, you may be able to use a stripey pattern to make a gold filter tip, but it'll hardly be noticeable even in close-up (you can barely see it on the chick with the mohawk). Max out the dimensions for a cigarillo or tick the horiz separation for smoking two at a time.

4. I haven't figured out a way to make a pipe stem, cigarette in a holder, or an obviously hand-rolled cigarette/joint. Any ideas? EDIT: See some multi-object pipe designs in posts 175, 180, and 184 - the latter is a hookah.

Sheriff Mabel.pngCapt Kate.pngChuck.pngAshleigh.pngPirate.pngPipi.pngLeasha.png

PS:

Best animation with a cigarette is from Natsu: She throws her head back to straighten her windpipe, stretches her arms up to expand her chest, and declares, "Man, what a drag!"

Second best is Leixia's critcal, but works better I think with a generic character using upbeat girl or femme fatale voice.
 
You sir have a degree in cigarette special items, most of what you described is new to me and well thought out...
being a CAS veteran, it is humbling to see one so well versed in the art of smoking artefacts (while i do not smoke or condone smoking IRL, i think it looks cool on CAS, and yours are a pretty good example).
So all of your girls are...smoking hot ;o)...

you can look up my Cervantes El Che CAS or my C-Ape Tain gorilla for my own personal way to do a cigar and a smoking pipe (using two slots though)...
 
Thanks. I don't smoke cigs either, but I do enjoy a pipe, and that's why I'm not satisfied with two-item builds. The shape is fine, but the position is unlikely; just can't get the bowl (say the apple) low enough. When I smoke a straight pipe, it doesn't stick straight out, unless it's smaller than the smallest pipe I can design in CaS. A larger pipe isn't heavy in an absolute sense, but it's heavy for your mouth, and all the weight is at the end of the lever arm, hence a bit of a droop. Maybe that's something most folks won't notice.

Long pipes usually have a bent stem. Something like the butterfly antenna, super small, with the demonic horns, also minimum size, for the bowl, would resemble pipes I've seen in real life, but again, the bowl would have to be lower than it's allowed to go. That would be a long but lightweight pipe; a heavier pipe with a long stem would be be more steeply bent, like the calabash style (Rathbone version of Sherlock Holmes). I have a calabash (faux like most nowdays), and I never hold it just in my mouth, always in my hand. I'm afraid that the bowl will detach from the stem, fall to the floor and be damaged. Such a pipe is fairly expensive.

For your c-ape-tain, I think you might consider inverting the apple; the pipe I'm smoking now is wider at the base of the bowl. Also, with the horn, you can change the color to a three-stripe pattern. Set two stripes the same (black) for the stem, near the mouth, with the third a different color (brown) the same as the bowl; that'll make it look more real. Crazy patterns aren't far-fetched for novelty pipes; I had a rather attractive one painted with zebra stripes, but alas it was of wood other than briar, so it didn't last long.

GEF

interesting technical discussion, mister pipe expert (no you are not a plumber) ;o)
i'll keep your advice in mind...
 
I could have sworn we already started one of these threads... In any case Copy+pasting from there:

-If you need to change one eye, inserting an apple or crescent moon may be the key. If you are looking for bright glowing eyes, use Halos. Example:
soulcalibur41.png

Folklore_Keats4.png

how do i adjusted those? in as the right sizes.. so i won't messed it up
 
Assuming you're asking about the halo to make the eyes, I imagine you've noticed that objects aren't centered. Maximize length, minimize depth, adjust the widthe to just under that of the model's head, position it, and then...the right eye is bigger than the left. Bump the horizontal positioning a single notch, and now the left eye is bigger. So, put it back to zero and work instead on Horizontal Rotation. Remember even at minimum depth the halo is still curved. Rotate the left side forward a notch or 3, simultaneously shifting the right side back, and you'll find a spot where the eyes look even. -GEF
 
yes, i was talk about the halos eyes but, i need more details.. like this?-

Horizontal: 0
Vertical: 0
Back: 0
Width: 0
Length: 50
Depth: -50
Rotate Vertically: 0
Rotate Horizontally: 0
Angle: 0
 
That's a start. I place it by
1) Moving it all the way forward (Back 50, temporarily);
2) Panning camera for a side view, then descending the halo until it lines up with the model's eyes;
3) Panning to front and setting Width as high as I can, but narrower than the model's head or helmet;
4) Moving the halo back into the model's head (reducing Back from max);
5) And making final adjustments, mainly the horizontal rotation I mentioned earlier.

So, Horizontal 0, Length 50, Depth -50, Angle 0...but other parameters set by the method I just described and may vary slightly between characters. Hope that helps; I'm afraid there's more art than science to it.
 
Breast Augmentation

This may be common knowledge but I didn't see it above. You can use the heart, or if you need separation, a pair of spheres, for falsies, although color matching is a trick; black works best (hides the line at the interface). A couple of spheres work with the minidress, changes the neckline but that dress is shiny like the objects, and it can also work with some colors on the right of the palette (View attachment 23535).

Exposed breasts are harder. You can place them so that they're framed by the hunter's suit or dancer's breastplate, but that works only in a static pose, as in this excellent CaS from Wolverine on the Hilde thread:View attachment 23088. Unfortunately, once the character starts moving (in combat), the alignment's shot, as you can see in these two poses of Hilde with the dancer's breastplate; even making the cups the same coler as the border (or flesh) doesn't help much:
Hilde Elemental.png
Hilde Element Detail.png
Correction: The coiled breatsplate is pretty stable, so it works with the boobs-through-a-hoop look, sort of. The problem is that it's not flush with the chest, so it doesn't provide a visual explanation for the shape of false breasts or hide the interface as well. However, these problems, like the imperfections with the techniques below, are much less noticeable during animation which has the same effect as a live striptease, revealing just a glimpse at a time.
Boobhoop.png

That leaves three approaches:

1) Totally topless. On a small model make the breasts -20, apply the triangle bikini, and make the heart big enough to completely hide the bikini (use snakes for nipples, demon horns if erect). The approach isn't ideal, especially in close-up. Matching the object to skin-tone doesn't work with pale skin; you need at least bottle-tan orange or sunburn pink, and you'll get best results with an unnatural color, in which case you may even find you can match default underwear (in which case you may not need the heart). Darker is better because it hides the line at the interface, but you still have the bikini straps, and they have an iridescent quality that makes them show up worse with the darker tones. You can hide the straps in back with a cape. The approach isn't perfect, but if Tira inspires you to make a hula dancer in traditional costume, it looks prettey good with her jolly 4A. Also good (but the camera angle's typically worse) with Viola's 44K. For pasties, use the “Goddess” ornament with feathers (instead of demon horns). Among the regular cast, even the ones with petite bosoms are too well-endowed for the heart to work. I've tried bottle gourds to get aureola plus nipples but can't get the dimensions right (and it wouldn't leave an object slot free for a cigarette). Correction: Looks like this can work with Tira, size is compatible and skin tone is near matchable.
Sunburn.png
Bottle Tan.png
Mer.png
Tira.png
If you experiment with a larger chest you may be able to open up an overgarment enough that it doesn't overlap the false breasts, which either makes the bikini unnecessary or hides the straps better. (The fur vest looks OK with overlap because the fur softens the interface.) These examples also show approximate matching to some more natural skin tones, yellow or dark tan.
Ashigaru.png
Yoho.png
Shower.png
Tigerskin.png
Even with yellow or black skin, color matching with default underwear isn't perfect, but it makes the garment less conspicuous than the bikini.
Ninja.png
Iaido.png
Negress.png

2) Breasts exposed above or through a garment, frex spilling over the corset or forced through a hole cut in a t-shirt, a rather contrived look but one I've seen in a photo from a topless freedom ralley. Use the bottle gourd as Wolverine did above; it's big enough for characters in the regular cast with a modest bosom, but not for Ivy, and still works better on a generic model with minimized chest. The advantage here is that the borders are a wide swath of cloth and wide swath of skin; the positioning can bounce a bit and still look right. The disadvantage, where flesh borders flesh, is that you've lost a visual explanation for the junction that the bordering garment provided. Also, as you can see in this Viola, color matching pale skin-tones is never quite right but looks OK from a distance (and looks better on a generic model with a ruddier skin tone). Use Basic 4 for the aureola - rotate a quarter and max size. Smaller won't work so you may need Basic 1 as for Viola here, but the border is ill-defined. For some garments you may need the coverage afforded by the technique above with the heart.
Viola.png
Sam.png
Boobfeathers.png
Where the breasts border a garment, color matching doesn't matter, which is why the cropped jacket is so useful in such designs. The hole-in-a-shirt look is weird but makes approximate color matching plenty good enough, and note that some stickers can provide a frame for the breast that the hunter's suit can't.
Ace.png
Ace Alternate.png
Bast.png
Ninja Nipples.png
Safari.png
If the breast is partially exposed through a rent too small for it to fit through, a fleshtone sticker is sufficient but a horn can help, and a striped pattern on the demon horns can make the tips different colors if only one breast is exposed. Bendy, bouncy, or twisty movesets mess up the alignment of the horns. An alternative is the impale scar, but then you need an extra sticker, so this works with only one breast revealed except for the rococo blouse (which needs an object to hide the buttons). If you can't supply a border for the circular sticker, you can use the eye (sideways) with another sticker to cover the pupil. (Bonus tip: Use a scar to tear a hole in the veil for a cigarette to pass through.)
Daphne.png
Hilde Hoplite.png
Pyrrha.png
Bo Peep.png
Priestess.png
Leixia.png
For this character, I couldn't prevent overlap when the character moves, but I could use a sticker to provide a seam, a visual explanation for the pverlap when it occurs.
Cowgirl.png
Cowgirl boob.png
It's tempting to try to make the tight shirt or bikini with pareo seem to be tied underneath the breasts instead of across them, but it doesn't quite work. The angle of this pose shows why: The far strap looks fine, but the near strap's shape just above the breast is wrong in a way that spoils the illusion even when the character is in motion. With the tight shirt, this effect is even worse, because of the collar.
Boobknot.png

3) Exposed through sheer fabric. Use with two hearts to make a spiderweb fishnet shirt, one for the breasts and one for the aureola; just remember to angle the pattern to place an intersection over the navel, which should also be visible through sheer fabric. Alternately use the lace pattern on the heart for a bra and match it on the "bridal" shorts. For a similar effect, a weave pattern on underwear ceates the illusion that yellow or pink from the underwear pallete is pale fleshtone.
Poser.png
Lace.png
Hilde Formal.png
Even more natural-looking, for any who don't yet know, the hunter's suit can be set to fleshtone, spots positioned for aureola. The suit's versatile enough to be part of a dress (especially if you place a sticker over the midriff), but the same trick works with the dancer's shirt, because the sleeves actually are translucent so it sets up the iillusion that the chest is too.
Oprah.png
Ivy Elf.png
Flapper.png
Pisk.png
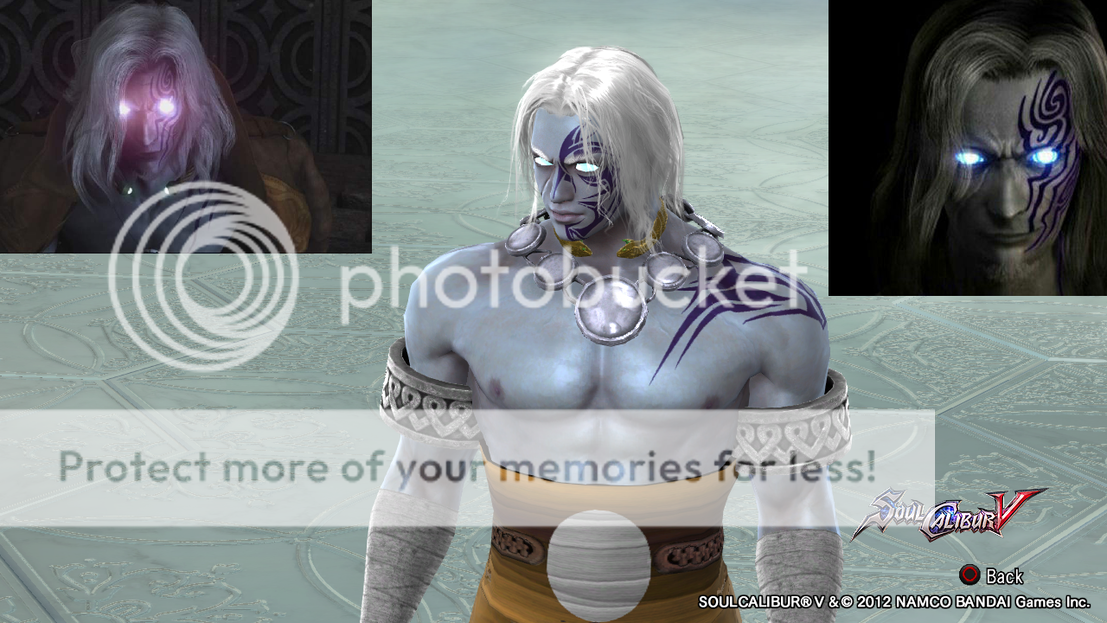
Similarly, you can make the voodoo breastplate fleshtone and add horns (because you can't put a sticker on it) This is my favorite look but it doesn't allow much variation.
Boobcage.png
Hilde Barb.png

They're often too subtle to spot in play (except in apat & damp's CE), but you can manage a "wardrobe incident" with the toga (including the absolution toga) or use the gunshot scar to show that there's no bra beneath a tight shirt as with Huckleberry Hilde here. A wardrobe incident with Ivy's catsuit isn't subtle unless you use more stickers to make a bra.
Steampunk.png
Hilde huck.png
Mirror.png
Dragonbra.png
If you make a character like this, use her to ring out Raphael.
 
Back